| |
|
STEP
|
|
|
IMAGES
|
|
DIRECTIONS
|
| |
|
1
|
|
|
 |
|
Required for this exercise
To disassemble a Flash Drive: (1) the Flash Drive; (2) an Allen wrench; (3) a Phillips screwdriver; (4) a flat-tipped screwdriver; (5) a Nylon Safe Open Tool; (6) a star-tipped screwdriver; (7) screw storage; (8) a Tri-wing Driver; (9) a T-4 Driver; and (10) a T-6 Driver.
|
| |
|
2
|
|
|
 |
|
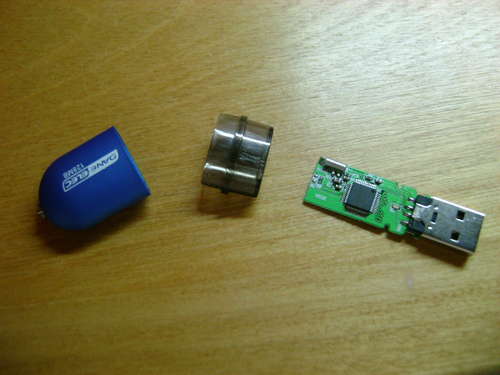
Remove the circuit board
Separate the two halves of the outer casing of the Flash Drive. The USB connection and the circuit board are independent from the casing and can be used in this state.
|
| |
|
3
|
|
|
 |
|
Disassemble a flash memory based device
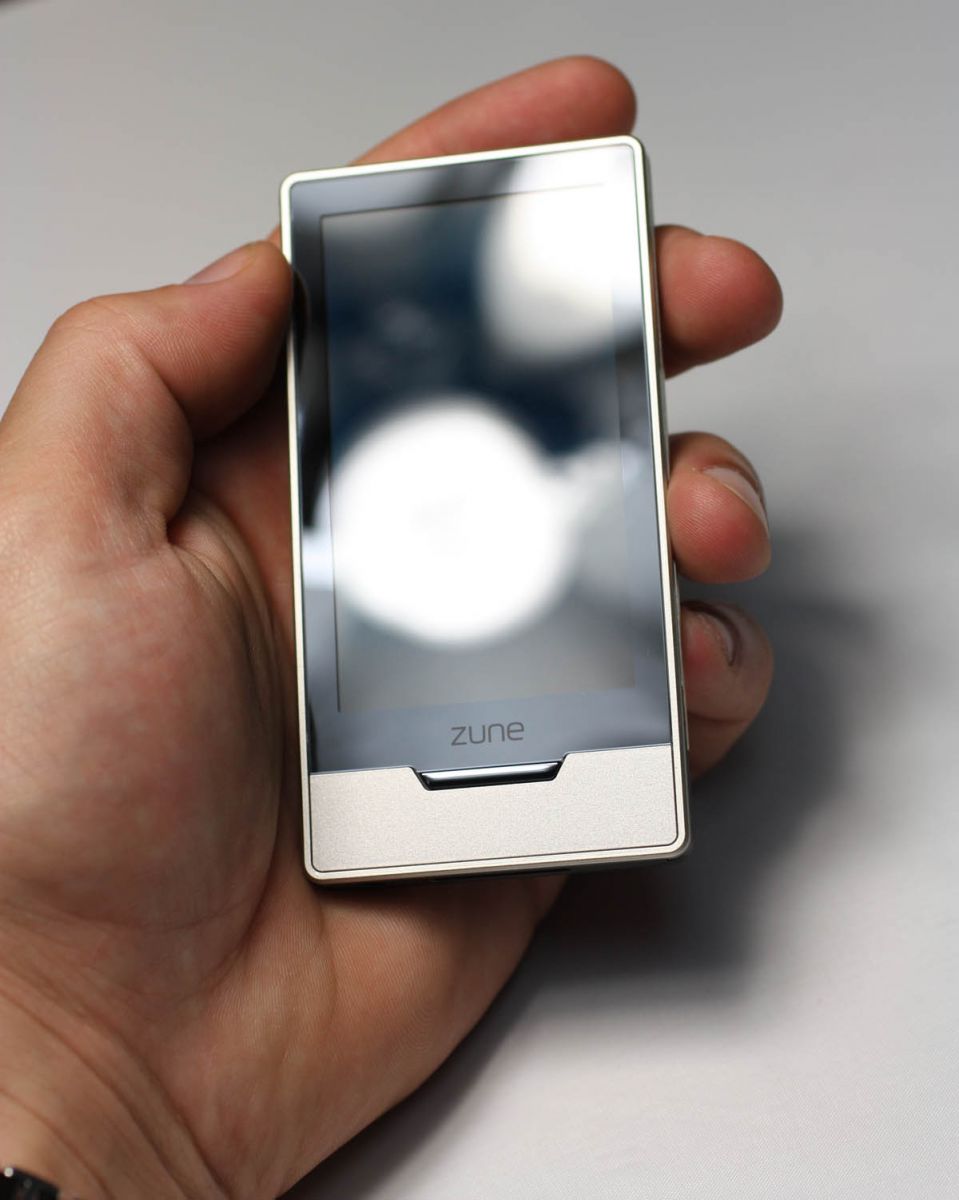
The form factor Zune HD looks and acts like an iPod Touch. The Zune HD has a 3.3 inch OLED display which draws significantly less power than a traditional LCD screen with backlit LED’s, amazing for watching movies with 8.5 hours of video on a full charge.
|
| |
|
4
|
|
|
 |
|
Warranty Alert:
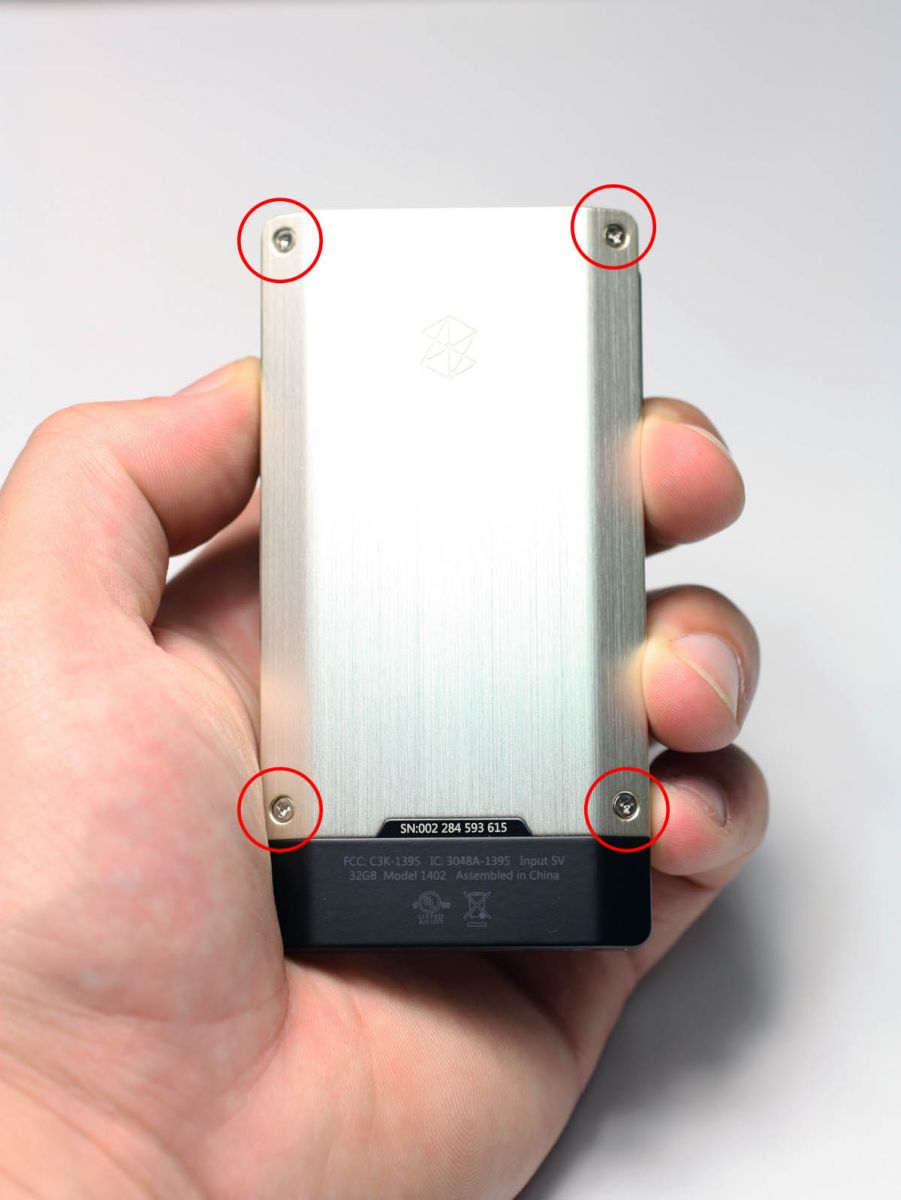
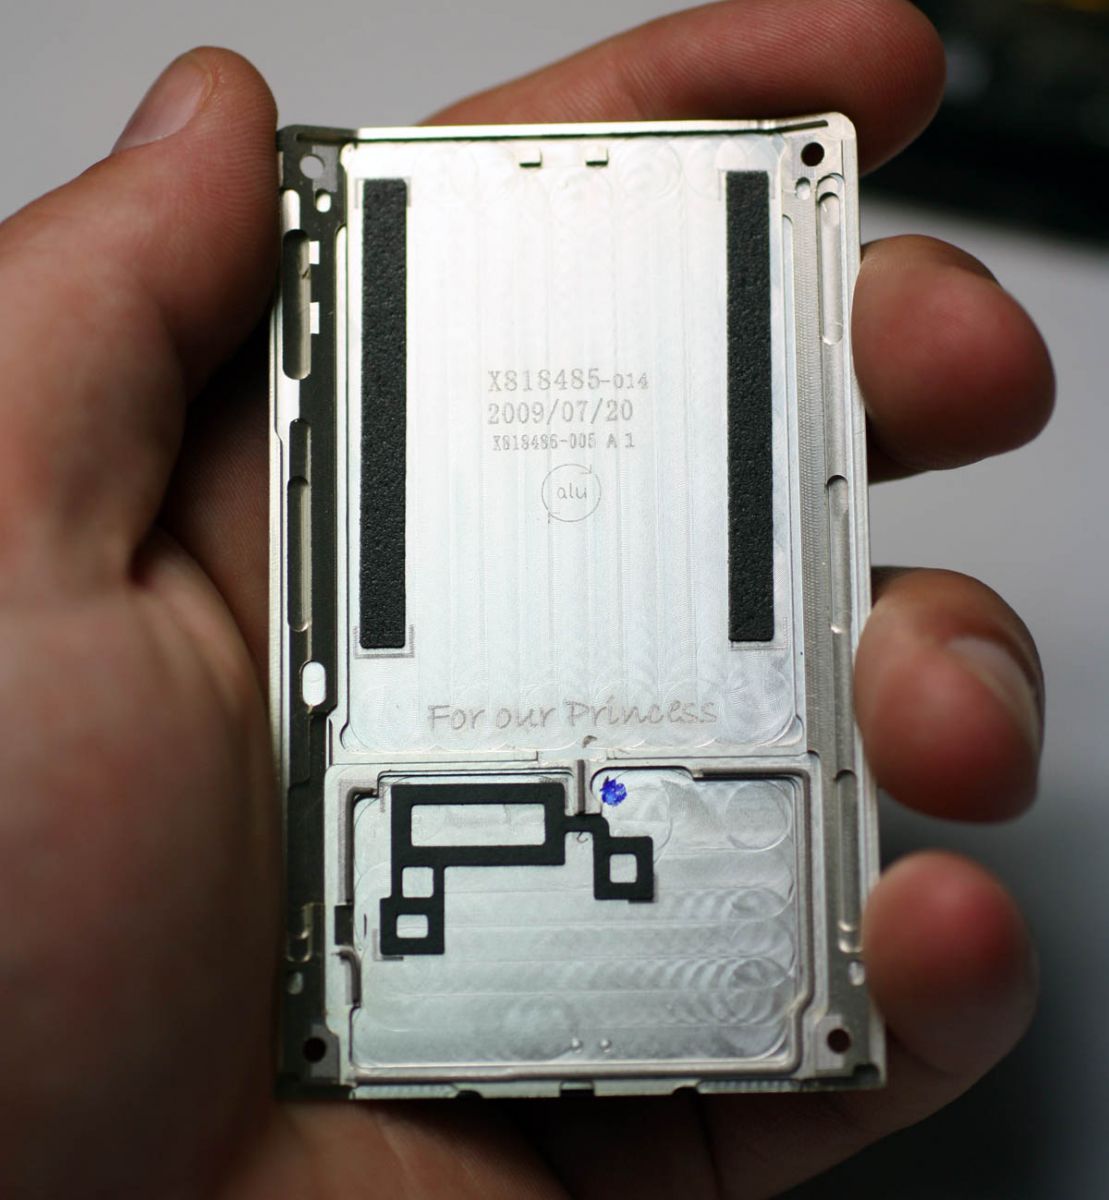
Turn the Zune HD over and note the 4x Tri-wing screws. Your warranty expires upon opening this device. Even though there are no stickers warning you of this, you better not tell MS you took off the backing and tried to replace a screen or battery. While Apple has a more hidden approach to traditional screws, Microsoft uses Tri-Wing screws in plain sight. Apparently there is a hidden message inside the back panel: “For Our Princess,” which is rumored that an MS team member may have passed during the dev stage in this new Zune.
|
| |
|
5
|
|
|
 |
|
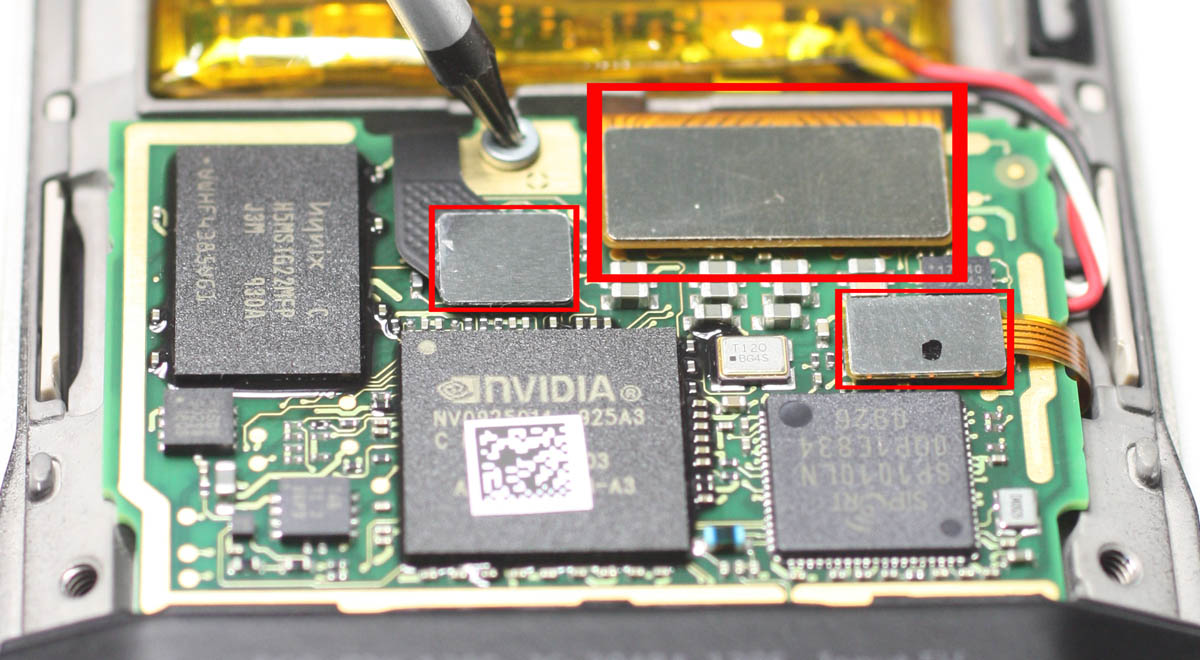
Remove the black serial plate
After the back panel has been removed you can see the board, and battery. There is one T-4 Screw that can be removed now with the T-4 Driver. There are 2 more hidden T-4 screws, and 1 T-6 screw (T-6 Driver) that need to be removed. Take off the black serial plate by carefully peeling it from its two side clips. Don’t force it off, after removal you can see the screws.
|
| |
|
6
|
|
|
 |
|
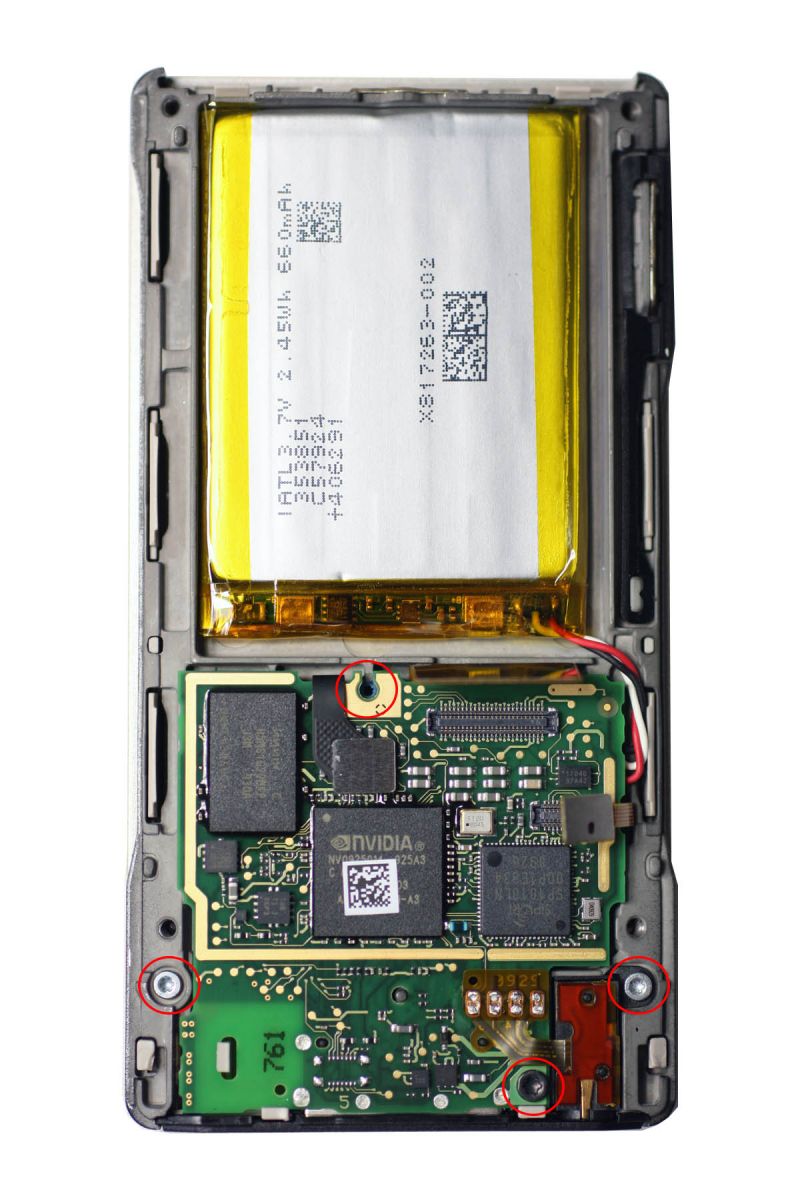
Remove the circuit board
After all the screws have been removed, you can disconnect the three ribbon cables from the board. The three cables are for the: Digitizer; OLED Screen; and Home Button Release the board from the frame and use a nylon spudger tool to unseat the battery. The board and battery should lift out easily.
|
| |
|
7
|
|
|
 |
|
Remove
After the back panel has been removed you can see the board, and battery. There is one T-4 Screw that can be removed now with the T-4 Driver. There are 2 more hidden T-4 screws, and 1 T-6 screw (T-6 Driver) that need to be removed. Take off the black serial plate by carefully peeling it from its two side clips. Don’t force it off, after removal you can see the screws.
|
| |
|
8
|
|
|
 |
|
Remove
After the back panel has been removed you can see the board, and battery. There is one T-4 Screw that can be removed now with the T-4 Driver. There are 2 more hidden T-4 screws, and 1 T-6 screw (T-6 Driver) that need to be removed. Take off the black serial plate by carefully peeling it from its two side clips. Don’t force it off, after removal you can see the screws.
|
| |
|
9
|
|
|
 |
|
Remove
After the back panel has been removed you can see the board, and battery. There is one T-4 Screw that can be removed now with the T-4 Driver. There are 2 more hidden T-4 screws, and 1 T-6 screw (T-6 Driver) that need to be removed. Take off the black serial plate by carefully peeling it from its two side clips. Don’t force it off, after removal you can see the screws.
|
| |
|
10
|
|
|
 |
|
Notes
The memory stick is rapidly replacing the floppy for many reasons. This compact and lightweight drive is more durable than a floppy. Flash memory can hold data for up to 10 years. And it has also been known to survive immersion in water. However, if your flash drive does get wet, it is vital to wait for it to completely dry before plugging it into the USB port.
|